Summer Guest Blogger Friday! It's Amy from Marvelous Mommy!

30 July 2010 | 7 Comments
I hope you'll give a wonderful welcome this week to Amy from Marvelous Mommy!  She's offering up a great tutorial for you to enjoy.  Hop over and say hello to her, she has a blog filled with recipes, reviews, & all kinds of fun stuff.  Have a GREAT weekend!

How To Make Homemade Hand Sanitizing Wipes

I first learned about making homemade hand sanitizing wipes while watching The Doctors when I was pregnant. I decided to try it out and I'm so glad I did. I use them ALL the time!! I keep them in my car and they really come in handy. I use them to wipe down the grocery cart before I put Natalie's cart cover on and I also use them to wipe off my hands in the car. I have even used them to clean up a mess in the car. I wouldn't use them as baby wipes though, they do contain alcohol which can easily be absorbed through your little ones skin.   

Photobucket

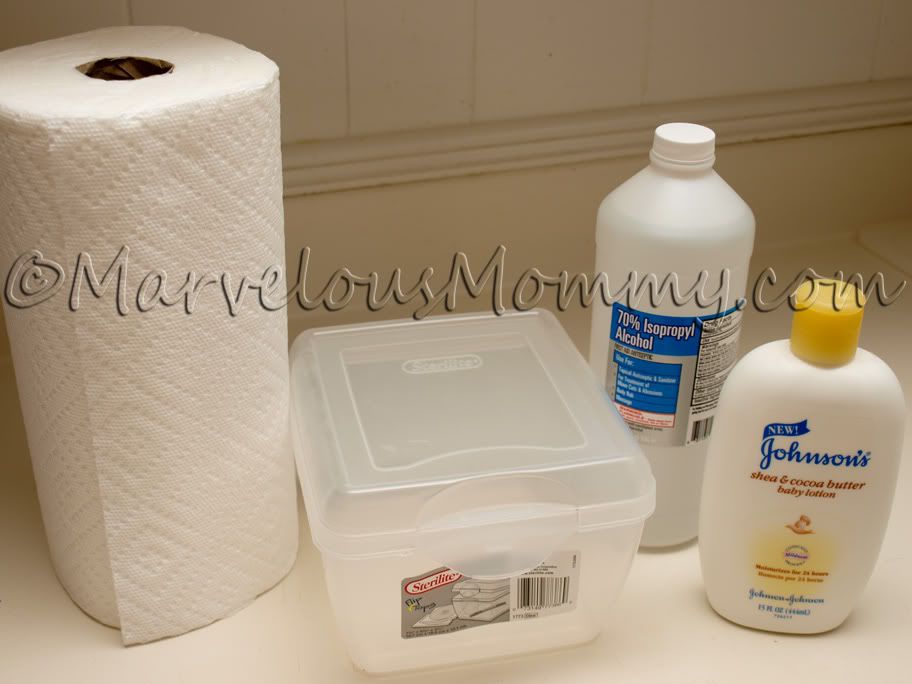
What you'll need:
  • Thick Paper Towels
  • Alcohol
  • Baby Lotion
  • Container
Any alcohol and baby lotion will do. I would recommend using thick paper towels because the cheap kind might break down to easily. Also, the square container I am using was purchased at Wal-Mart for about $2.

Photobucket

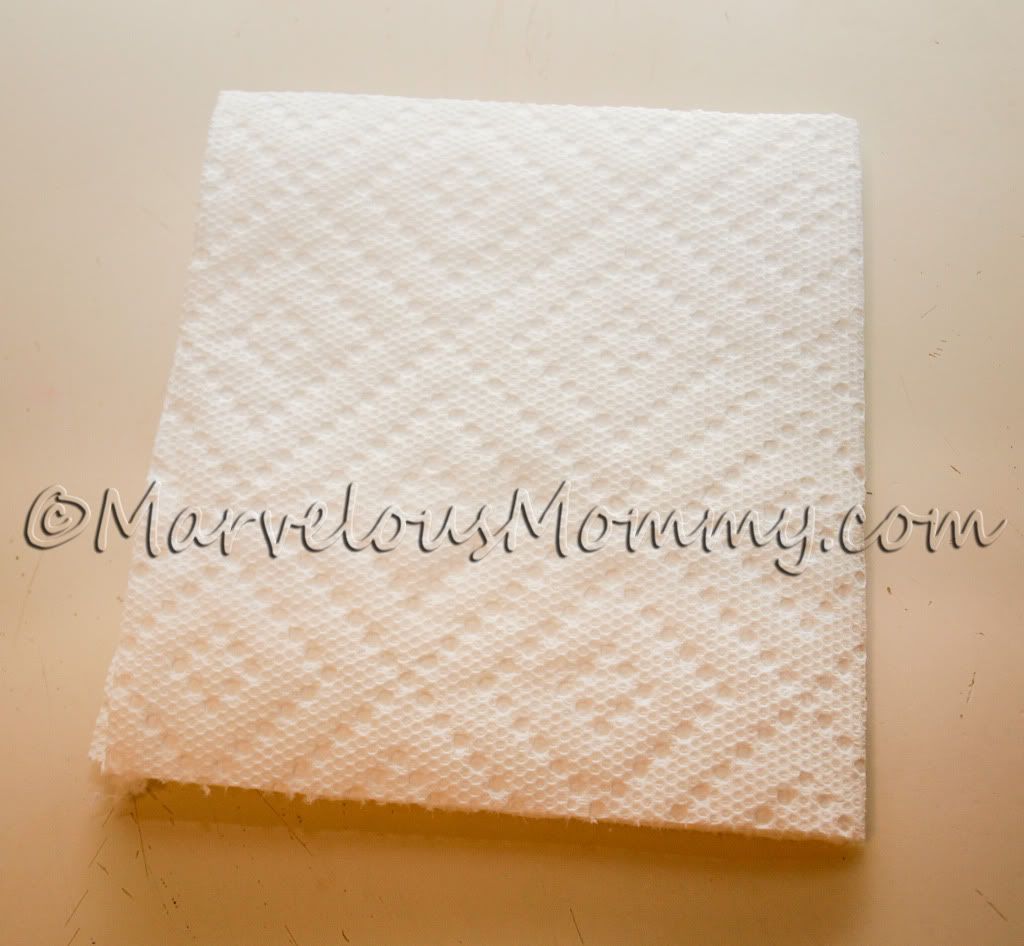
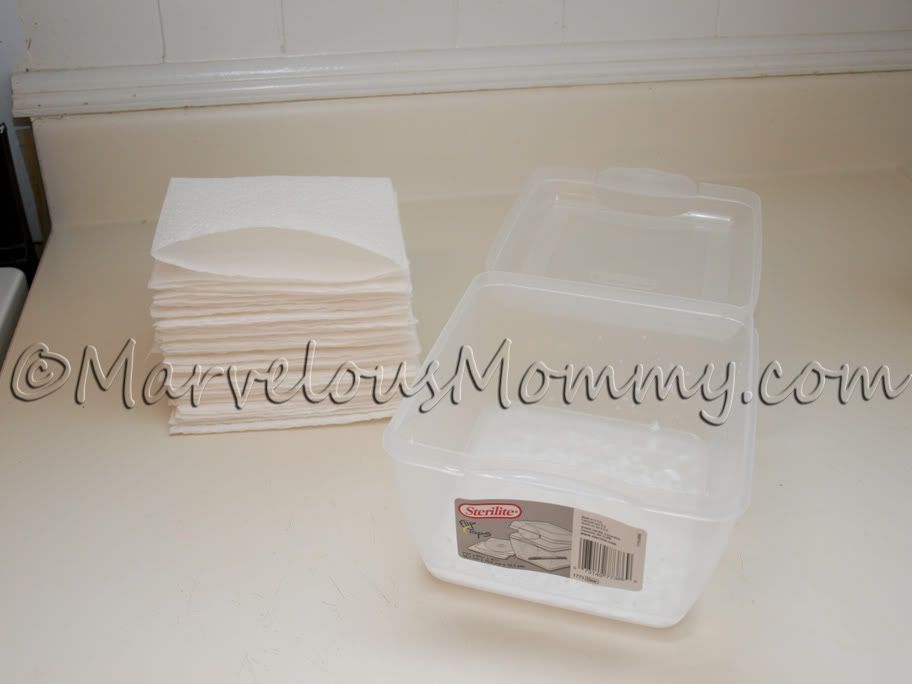
First you need to fold your paper towels to fit into your container. I folded my paper towels in half twice. This step is pretty straight forward and super easy. You can even have your children help!

Photobucket

Next you need to fill your container with half lotion and half alcohol. Make sure you mix them together well. I only fill my container about half way up. I ended up using about half the bottle of alcohol. It's not an exact science. I make them different every time.

Photobucket

Now just add your paper towels. They should soak up all of the lotion/alcohol solution. If the paper towels aren't completely soaked you can add more of the solution and if they seem to wet don't worry. They WILL dry out some, especially if you keep them in your car. 

Thanks for reading my guest post today! If you enjoyed this post, please come visit me at MarvelousMommy.com to read my other marvelous posts and to check out my weekly memes!

Big Boy Room

29 July 2010 | 27 Comments

Heart wrenching and happy.  That is this post.  I am excited to share with you Finnegan's transition from toddler bed to twin and his bedroom re-do.  I am not so excited that my little munchkin is growing into a young man before my very eyes.

finn's room 058

We didn't do a whole lot when Finn transitioned from nursery to toddler room other than changing the crib to a toddler bed, adding a toddler sized duvet & cover, and getting some organizers for his plethora of little toys.  His room is tiny with really tall ceilings, so we tried to go vertical as much as possible.  Organization, something that would grow with him, and a space he could enjoy were all priorities.  We didn’t want a particular theme that he might get tired of either.

The first thing you see is a wall of art.  We kept {and still love} the Beach Glass wall color.  The blue frames were in the same spot in the nursery, so we left them there and changed the pictures out.  I added a DIY silhouette of Finn {tutorial} and lots of fun brightly colored pictures.  The "F" I picked up at Michaels and decoupaged some red paper to the front.

We also added a table and two kid sized Ikea stools so that he could play with play-dough or mood sand or color in his room.

finn's room 007

finn's room 005 005 

finn's room 040

We also added a cute cars/road rug for him to play with his matchbox cars + parking garage.  He is currently obsessed with cars, so this is a favorite.

finn's room 024orite

His daybed was a steal at Ikea!  We opted for the blocks to loft it a bit {he needs a stool to climb in there} and found some great cubes that fit under the bed perfectly.  It solved the organization problem perfectly!  He has one pull out bin of art supplies, two big bins full of books, and four little ones with trains and other toys with small pieces. 
 
I absolutely love his bright orange sheets + all of the fun pillows.  The mattress is a Sealy that we bought at Costco for $149.  The coverlet is really a much darker grey color than is appearing in the photos.  I was looking for a duvet instead but after searching everywhere, the grey/green combo + texture fit perfectly.  We will likely just put some warm blankets on for winter. 
 
finn's room 031
 
finn's room 082
 
003
 
finn's room 037
 
finn's room 080
 
And finally, the $35 Craigslist steal of a dresser.  AKA the crazy ass project that took forever between sanding and painting and searching all over for drawer pulls.  Check out these before and afters!
 
We were able to re-use the peel + stick vinyl dots.  {Dottilicious by Wallcandy Arts, we gave the pink + yellow to a friend.} The were all over the walls of his nursery, on top of each other in different configurations.  After almost 4 years of being on the walls, they peeled right off with zero problem, we stuck them on the armoire while we figured out what to do with the walls, and they still peeled and stuck on his wall just as great as the first day we used them.  I wanted them to look like they were exploding from his lamp.  Mission accomplished.
 
finn's room 021 finn's room 022
 
009
 
finn's room 052
 
I hope you like it as much as Finn does.  I'm thinking about moving in there and saying to heck with Dave.  Next week I will have for you a tutorial on the cheater way to do the silhouette + the transformation of that hideous Craigslist dresser!

Sources {Some are Amazon Affiliate Links, other than that I was not compensated in any way to mention these}:
Room Color - Beach Glass, I can't remember which paint line
Red Stool - Target
Room Essentials Persimmon Sheets - Target
Tromso Day Bed - Ikea
Grey + Green Coverlet - Kohl's
Lack Blue Table - Ikea
Turquoise Mammut Stools - Ikea
Melissa + Doug Parking Garage - Amazon
Armoire - Ikea
Dresser - Craigslist, Drawer Pulls - Lowes, Color: Granite by Rustoleum
ITSO Storage Cubes + Boxes - Target
Car Play Rug - Ikea
White Frames - Ikea
Blue Frames - Homegoods
Baseball Canvas - Homegoods
Blue Curtains - Ikea
Dottilicious - Wallcandy Arts
Mirror Strands - Swan Creek Candle Company
Pillows + Forms - Ikea
Letter "F" Pillow Tutorial

Anything I didn't cover, just ask!

Sleeping.

27 July 2010 | 13 Comments
Last night your daddy called to me in the dark and told me to come look at you.  He was checking on you before turning in for the night as he always does.  That last little check to make sure you're all snuggled in and that there are no monsters hiding under the bed.

And we stood there, with the blue glow of your nightlight just looking at you.

Arms over your head, covers kicked off, your belly peeking out under too small pajamas that you refuse to give up.  Your ankles and calves exposed too, evidence of the inches you've grown these last few months.  Your hair was wild and a little sweaty as it always is when you sleep. 

And you just looked content, as if sweet dreams were playing in your three year old mind.

I stood there, with your daddy's arms around me just watching your belly go up and down with each breath.  I know we are doing something right.  It tides me over on those days that I tell you no 57 times before breakfast.  It makes all of those time outs vanish into thin air.  In that moment, all either of us saw was perfection in those long legs, in your sweet face, in your hands, your mouth, your ears.  Those ten little toes couldn't have been made better. 

I love that you are who you are Finnegan James.  And I love your daddy for giving me reason to pause and take in these moments before they're gone. 

It certainly isn't something I do often enough.

S'Mores Cheesecake!

26 July 2010 | 10 Comments
This recipe... to die for.  I was so nervous because when I initially made it, I made it up as I went along.  I made two versions of this cheesecake and I'm going to give you the best of both versions.  It does take some patience to make this... mostly in cooling and waiting times, but I promise it is worth every minute.   

S'Mores Cheesecake
9" springform cheesecake pan

For the crust:
20 squares {10 full sheets} of plain graham crackers
1/4 - 1/3 cup pecans
1/4 cup brown sugar
5 Tb butter, melted

For the filling:
{2} 8-ounce packages of cream cheese
1 cup brown sugar
1 Tb vanilla
5 eggs
2 Tb flour
1/2 t. baking powder
1 small jar marshmallow creme {mine was 7 ounces}
2 cups mini marshmallows
3/4 bag {good quality, I used Ghiradelli} milk chocolate chips


Preheat the oven to 300 degrees.  Pull out cream cheese and allow to soften.  Very lightly grease with butter the sides of a 9" springform pan.  {If you don't know what size your pan is, take a ruler and measure the bottom diameter.  I initially used a 10" pan & it made the cheesecake too thin.}


In a food processor throw graham crackers, pecans, & brown sugar in and process until fine.  Pour in the melted butter in a steady stream until mixture is crumbly.  Pour into the bottom of a 9" springform pan & using the bottom of a glass, press until flat crust is formed.  The crust is meant to be really thick so that the graham crackers are properly represented.


Using a stand mixer {or hand mixer} put the cream cheese marshmallow creme, and brown sugar into the bowl and mix until incorporated.  Add the vanilla + eggs one at a time.  Then, add the flour and baking powder.  Mix in 1 cup of mini marshmallows to the batter until just incorporated, about 30 seconds. 


Pour filling into the springform pan, sprinkle with 3/4 bag milk chocolate chips, then the remaining 1 cup of mini marshmallows {you could also cut up big marshmallows if you have them} and press very lightly into the batter.  Put in the 300 degree oven for 60 minutes.  Do NOT open the oven, no matter how tempted you might be or how good it might smell.  The top should be a nice toasty marshmallow color, the center few inches will still be jiggly, it will make you question its doneness.  Trust me, it is fine.

Turn off oven, open the door wide to let the heat out, then close up the oven door again and set the timer for another 60 minutes.  Bringing down the temperature gradually will help it to not crack in the center.

Pull it out of the oven and allow to cool completely, then store in the refrigerator for at least 8 hours or overnight until ready to serve.


Heaven on a plate in the form of beautifully toasted marshmallow goodness.


Can't get enough s'mores?  Check out my s'mores bar featured on Birthday Girl.

Linked to: Today's Creative Blog, Somewhat Simple

Summer Guest Blogger Friday! It's Brittany from Barefoot Foodie!

23 July 2010 | 16 Comments
I'm hazarding a wild guess here that you probably know {and may even harbor a girl crush on} Brittany from Barefoot Foodie.  Don't go over there expecting delectable treats though unless by treats I mean Bourbon Slushies, make up a big ass batch of those and read her archives.  If you've been ignoring your Kegels, you may just pee a little from laughing.  You've been warned.  She has just launched a new website Brittany, Herself and is also co-founder of Aiming Low.  She is a big shot fancy pants all over these here interwebs and she is my friend.  {OK, so I may have hated her for two weeks in 2007 when she gave birth two weeks early and I was a week overdue...}  I would also like to say that I can not be held liable for anything she decides to share with you.  Ahem, here's Brittany!


It's hot.


Too hot for me to pretend that I'm going to share any sort of recipe with you that doesn't involve drinking a tumbler of margarita while standing in front of an open fridge door in my underwear.


So, I ordered in, and, instead, will talk to about something way more important than food, politics, religion, or even this mythical oil spill everyone keeps clamoring on and on about.


Dolphins dying of mysterious black goo seeping from a hole in the bottom of the ocean?


Where are we? Hogwarts?


No, this is way more significant.


My television.


I get attached to things really easily. I don't like change. I get angry when people get all up in my normal and fuck with things.


Namely. TV Networks.


They axe all my favorite tv shows and replace them with pretend reality dating shows, and shows about switching spouses or making fun of fat people.


I can do all that shit on my own for free.


I want a well written, fictional story line, covering the stuff I don't already see each weekend in the anti-itch cream aisle of Walmart.


I can't list for you the sheer number of shows I morn on a daily basis, because I'm too drunk to find my list, but here are some of my favorites...


My So Called Life. Confession. I dyed my hair red and got a bob just like Angela Chase. I dated our school's version of Jordan Catalano. This show was my life. Even when my boyfriend cheated on me after we made out in the school parking lot, with a non red-headed, non flannel shirt wearing cheerleader, and told everyone I wouldn't go past first base and I kissed like a fish, I still swooned over Jordan. Although, in an ironic turn of events, at our 10 year reunion, my ex-boyfriend, much like Jared Leto, turned out to be a complete douche bag, and I'm pretty sure they both have gonorrhea and small penises. So, in the end I guess I win. Life lesson? Date Brian Krakow.


The Nanny. Ok, now wait. I already know what you are gonna say, but you're wrong. This show was amazing. The story lines were consistently strong, it was funny, the theme song was catchy, her boobs were real, her hair was frizzy, in fact, SPOILER ALERT, the show didn't even jump the shark when Fran and Mr. Sheffield got married and had twins. They were basically the original Ross and Rachel. Only instead of we were on a break, they had, he took it back. Which, in my opinion, is waaay more assy and dramatic. In fact, the only thing I don't miss about The Nanny? Man-child Brighton's awkward bald spot. Sigh. I wonder if he's dead, lemme google it.......no, not dead. Bald, but still totally breathing. I totally had him confused with the kid from Ladybugs. He died. Right? Ugh, wait........yes. Dead.


Dirty, Sexy, Money.  OMG the series finale of this show was...OH WAIT. They didn't air the series finale. They just canceled it. No answers, or tying up of the storylines, or closure. I need closure. I need things wrapped up with bows and happiness. Not me doing the walk of shame the next day with old mascara and my panties balled up in my pocket, wondering what the fuck just happened. I want my congressional-tranny wedding. I want Juliette to come back from her real life rehab stint/island in the middle of fucking nowhere story line and be awkwardly touchy with her twin brother. I want Nick to pretend that Karen doesn't look 50 and menopausal, and that she could totally, logically, be carrying the baby of her father's ex business partner who has some weird obsession with glass swans and likes to kidnap underage Asian boys. HOW IS WIPE OUT BETTER THAN THIS SHOW!?


Dead Like Me. This hurts the most. Not because they ended it before any of my questions were answered. Not because they replaced it with that stupid show Huff, that nobody watched and was canceled after 5 seconds (Hello!? Everyone knows Hank Azaria is the poor man's Mandy Patinkin). Or because it was a complete waste of a truly unique and well written show. It hurts because they did the worst thing imaginable. They made a straight to DVD, post series movie. You know, to tie things up. Only, half the cast was missing, the story line was horrific, and OMG I PAID AMERICAN DOLLARS FOR IT. Life After Death was the worst DVD ever made, second only to Weekend at Bernies II. Or anything Eddie Murphy was in after Beverly Hills Cop 2. And now? It's ruined. My brain can never go back to when the show was good, I am stuck in the alternate universe where everything sucks and puppies die for no reason at all. Fuck you, Showtime. The oil spill is probably just the planet crying over how you massacred Dead Like Me. Even Earth hates you.


See!?


Now I'm all upset.


I'm going to go drink in front of my open fridge until the fat people on Wipe Out start to look like CC Babcock.

I Should Be Blogging.

22 July 2010 | 3 Comments
But I'm enjoying having my family here too much.  I promise to do Finn's bedroom reveal next week.  There are more important things like bubble baths with cousins, Meme's chocolate chip cookies, & playing soccer in the backyard keeping us occupied.  If I were any sort of real blogger I would have thought ahead and scheduled posts.  Instead I'm making S'mores Cheesecake and praying it turns out well.
I know, I know, I'm a great big blogging FAIL.
 
Which leads me nicely into my epic failure in the parenting department yesterday when Prince's Sexy MFer was on and Finn and I were bopping around the house and I realized he was SINGING ALONG.  Not really something a three year old should be rocking out to.  Lessoned learned. 

Tomorrow though... tomorrow you must stop by for the funniest guest blogger EVER.  It's going to be good peeps.  Anyone want to guess who?

For now, you should check out the following:

Caribbean Coconut Cream Pie

This Party... GENIUS.

Nectarine, Mascarpone, Gingersnap Tart

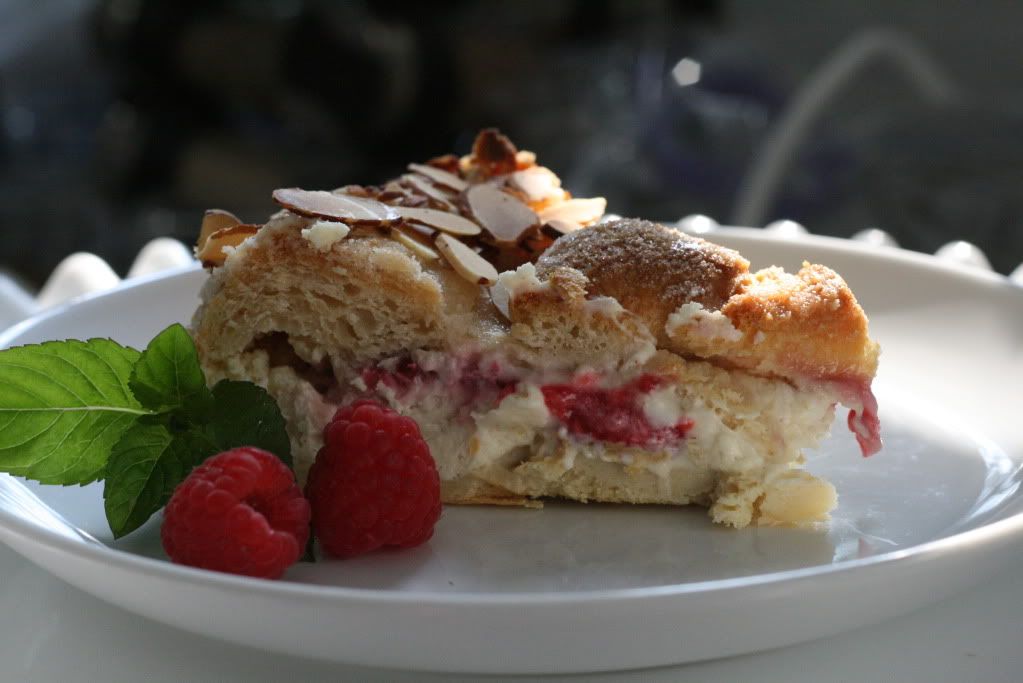
Raspberry Almond Breakfast Cheesecake

21 July 2010 | 7 Comments
Raspberry Almond Breakfast Cheesecake

For the cake:
{2} packages crescent rolls
{2} 8 ounce packages of cream cheese
3/4 cup sugar
1 tsp vanilla extract or vanilla bean paste
1 tsp almond extract
1/2 tsp cinnamon
zest of one lemon
{1} egg yolk
1 small pint of raspberries

For the topping:
egg white
1/4 cup sugar
small package of sliced almonds


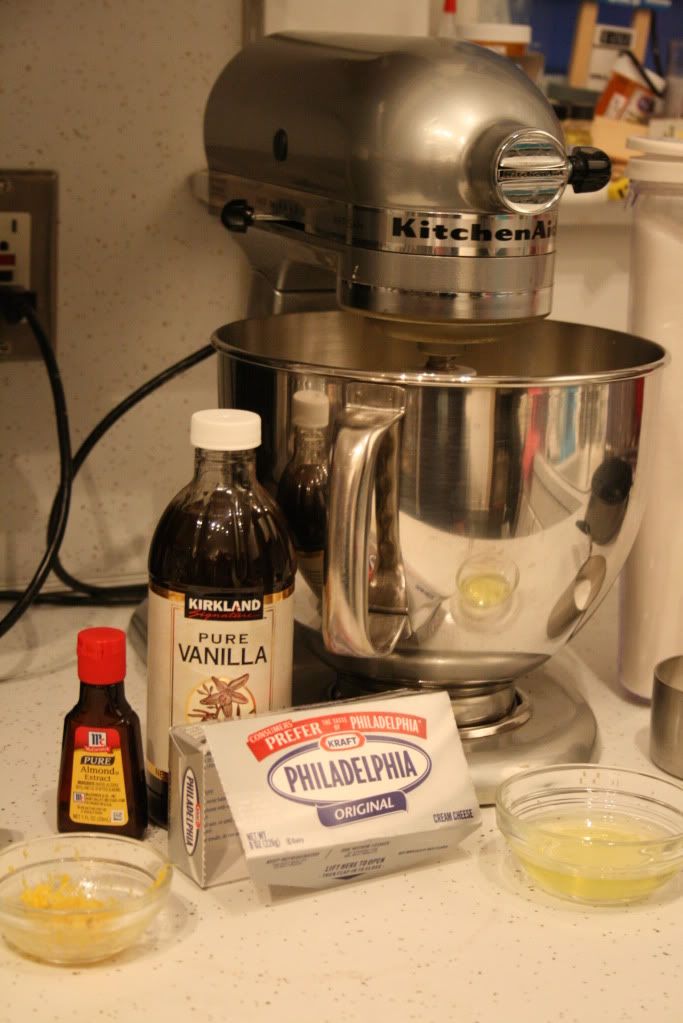
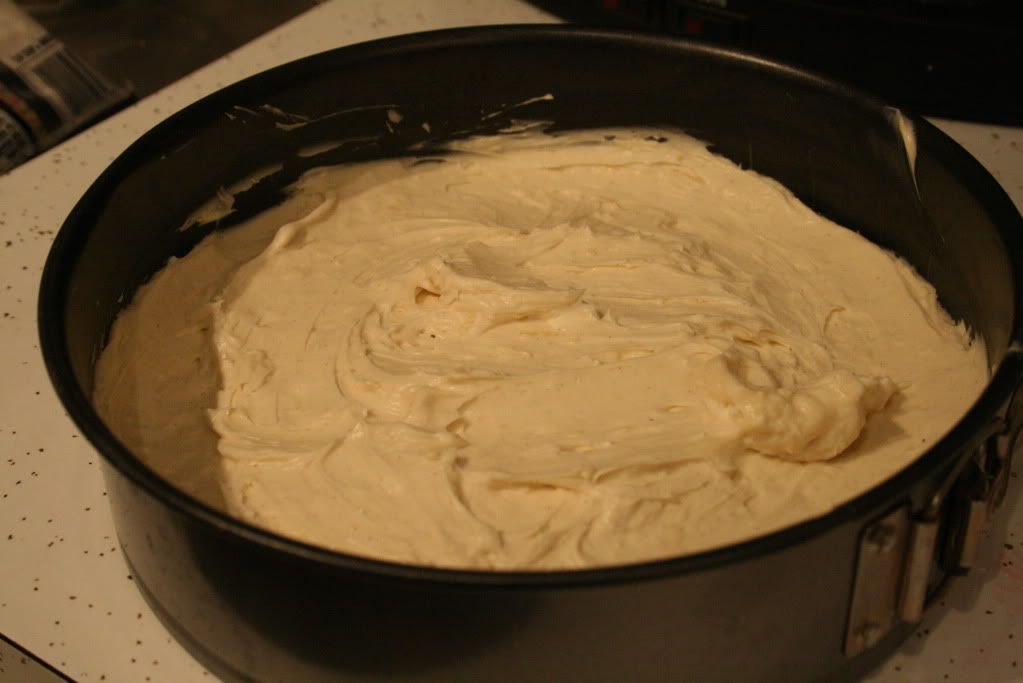
To begin, preheat your oven to 350 degrees.  Add the cream cheese, vanilla, almond, sugar, lemon zest, cinnamon, and egg yolk to a mixer and beat until smooth and fluffy, about 3 minutes.  {If you don't have a stand mixer, I would allow the cream cheese to soften just a bit before using a hand mixer.}


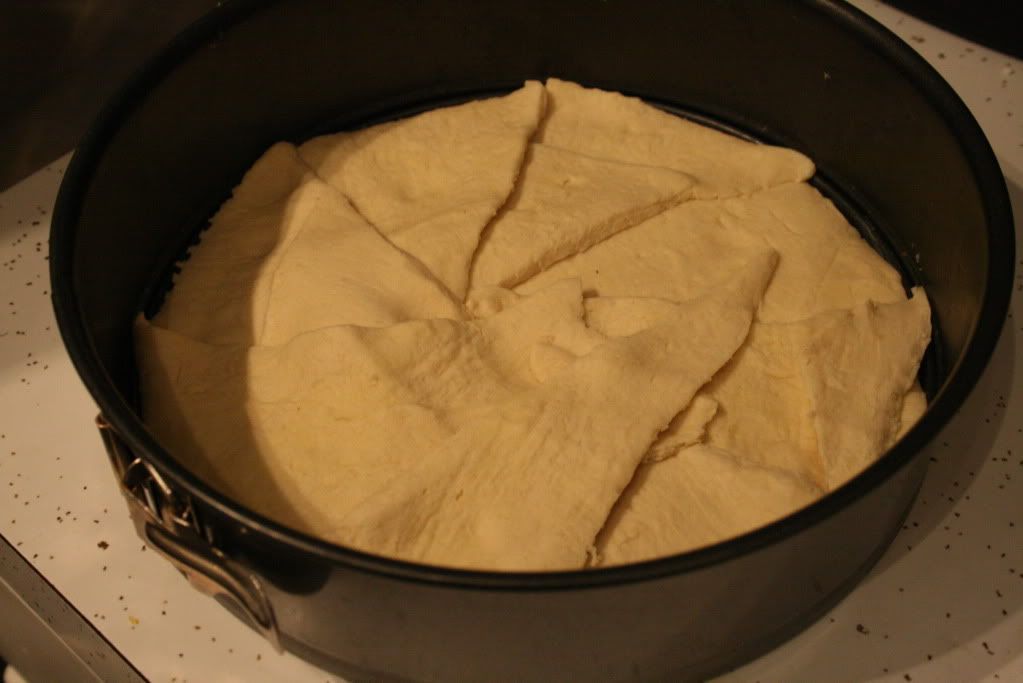
Unravel one package of crescent rolls and begin covering the bottom of your pan.  I used a round cheesecake pan here, but Emily uses a regular rectangular cake pan when she makes her version, just drop the cooking time to 25-30 minutes if you do.


Spoon the cream cheese mixture onto the crescent rolls... try to avoid licking the leftover batter, then say raw eggs be damned and lick it anyway.


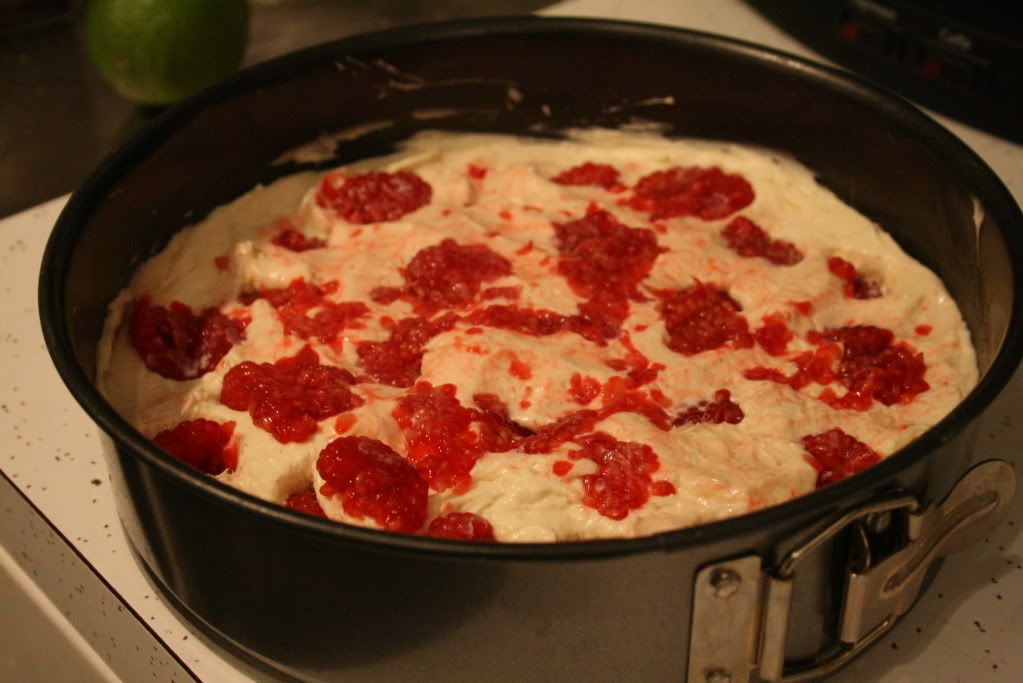
Add most of the package of raspberries to the batter by lightly squishing them and pressing them into the pan.  Reserve a few berries for garnish. 


Top with remaining package of crescent rolls.  Now, if you'd like it to look a bit fancy, lay them around the pan piece by piece with the point toward the middle, then curl the point in just a bit leaving a vent hole in the center.  Then give the whole top layer a good brushing with egg white.


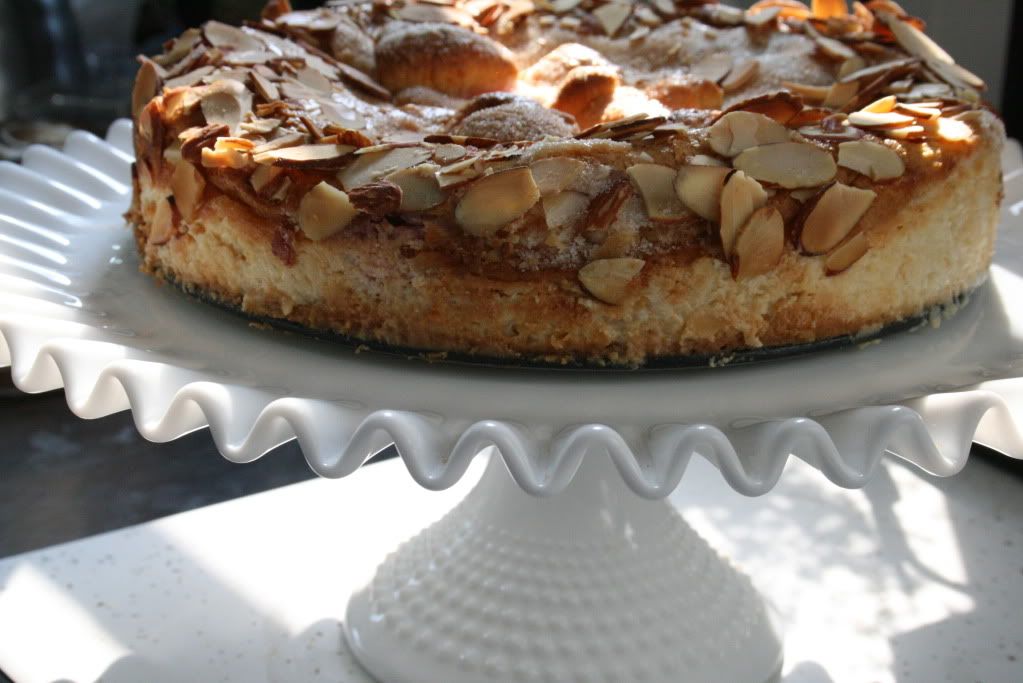
Finally, top with the remaining 1/4 cup of sugar, then sprinkle the almonds along the outside edge of the pan.  Pop it in the oven for 40-50 minutes {about 30 minutes if you use a rectangle pan because the layers won't be as thick} and allow to cool on a wire cake rack to room temp.

You can then pop it in the fridge until you are ready to serve!  It holds up really well to making it the night before which means getting to sleep in.  My idea of a great morning!


Then, add a few raspberries on the plate, a sprig of mint and serve!


Enjoy!!

Linked to: Show & Share Day

Confession: I Am Afraid of My Sewing Machine.

20 July 2010 | 19 Comments
In keeping with yesterday's post about a letter pillow and my subsequent buying of the pillow cover, I have a confession to make.  I am afraid of my sewing machine. 

About a year ago, my GramCrackers gave me, out of the goodness of her heart, a sewing machine.  It needed to be cleaned and fixed, but it was in great shape otherwise.  So I had it cleaned and fixed.

It has been in its box ever since.

I don't know why I am afraid, but I am.  I have no idea what I am doing, but sewing is something I have always wanted to do.  I've taken just a few lessons years ago... nothing to last me this long though.

Want another confession?  When I have to sew something, my husband does it.  He was in the military and learned just enough to get him through fixing small tears or being able to sew a button on.

I suck as a housewife.

My Crackers?  She is a world class seamstress.  She made my graduation dress after just a quick, "this is what I want" discussion from me.  She also made my confirmation dress, decorative pillows for our bed when we were little, all the dresses in my dad's second wedding, and has hemmed so many pants for me that I can not even count.  She is going to give me lessons, if only I would actually schedule them.

It's daunting.

My mother in law?  She sews too.  One of the first things I think of is watching her piece together these elaborate curtains with tucks and folds and pleats and all kinds of tricky shit.  Um, she has to be terribly disappointed in her son's choice of a wife for a multitude of reasons, not the least... I am a big sewing FAIL.

My friends?  They sew too.  Emily traded me sewing party bunting for my severely lacking graphic design skills.  She really got the short end of the stick in that deal.  Jen rocked my world and brought me the CUTEST ruffled camera strap that I love.  Just because that is Jen and she is awesome.  Bea sews up things like baby dresses and Monty's cute dog collar and all kinds of crafty stuff.  Jaime sews anything you put in front of her, the cutest bags and dresses for her girls and all sorts of other things.  She even has an Etsy store, she's that good.

So tell me how to start.  How to take that first step because I don't even know what a fucking bobbin is or how it's used, but apparently it's pretty important.  What should I do for a first project?

How To Make a Letter Pillow

19 July 2010 | 13 Comments
Part of Finnegan's room reveal {which I will hopefully get to this week} includes this DIY initial pillow.


I thought that you might like to see how I did it, so here is the SUPER EASY tutorial.

First, take your pillow cover, wash it and dry it {without fabric softener} and then iron flat.  Now, if you're super crafty {way more than I can handle} you can make your pillow cover.  I bought mine at Ikea.  Ahem.  I am not a seamstress, therefore I buy.


Then, I went to Microsoft Word and made my letter in Word Art.  My pillow cover was 20" square so I made my paper legal size and filled it with the F.  Then I cut out a piece of freezer paper {buy at the grocery store} to legal size and loaded that into my printer, making sure that I printed on the non-shiny side.


Once you have it printed, make sure the sizing is a correct fit for your pillow cover.


Then, start cutting your template.  I used an x-acto to cut the straight lines and scissors to cut the curves.  The only thing you have to be careful of is a clean line on the white parts, you will throw away anything that is printed on which is a bit counter-intiuative to cutting something out normally.


Next up is the ironing!  Per the recommendations of some of the tutorials I consulted, I ironed on a full sheet of freezer paper to the inside of the cover first, then I ironed on the cut out f to the outside of the cover.  I used a hot iron on the non-steam setting.  I used a lift and press method {rather than ironing it regularly side to side} so it didn't mess up the freezer paper where it was cut.  When the ironing was done, I slipped a cutting mat on the inside of the cover as an extra precaution against the paint bleeding through.
 

Here it is ready to go.  Paint carefully using a stamping technique rather than a swiping technique with the paintbrush.  Especially near the edges so they don't lift.

Allow to dry flat for 72 hours {or whatever the back of your paint bottle says and stuff with a pillow! 

EASY!!

You + Me

18 July 2010 | 3 Comments

How was your weekend?  I hope it was amazing.

I have a big week planned for you.  For realsies.

Just you wait.

You and me, together. Yeah.  Yeah.

Summer Guest Blogger Friday! It's Meghan, Who Isn't a Blogger At All!

16 July 2010 | 3 Comments
I'd like to give a very special welcome to Miss Meghan today.  She's not a blogger, though she will be soon.  She is creative and crafty, a new homeowner,  Mama to a wonderful little boy named Flynn, she is the girl who will tell you how it is, she is fiercely loyal and she is my cousin.  We are very much alike... it may have something to do with the fact that I was her nanny for the two summers I spent in Atlanta.  She's about to turn this blog into a frat house.  {Love you Megs!}

Please give her a warm welcome and tell her what a great job she did!

Good Friday to Everyone! First I would like to introduce myself to ya’ll (that’s how we say it down south). I’m Meghan, 25, libra, crazy college football fan, baby momma to a beautiful little boy and the gravity that keeps my family afloat. I have yet to start my own blog…but would like to in the VERY near future. That leads me to this AWESOME opportunity that my dear, dear cousin Michelle has given me. For those of you who give a shit, Michelle is actually a HUGE influence in my life. She lived in Atlanta with me for a short stint during my “developing” years. I have to give credit where it is deserved, so we’ll just say that the following post has a little to do with events that took place down south, probably ones Michelle would like to forget about, but have shaped me into the having a “crazy” side that I will cherish forever.  Michelle was always fun and willing to speak her mind and not afraid of what others thought or think. On that note, this post is all about keeping it fun, and if you can’t make fun of yourself then your in serious trouble.


A couple of weeks ago I was compiling pictures for a Father’s Day photo book. This is when I suddenly realized…..Could someone PLEASE hold my DAMN drink! I went through every photo for the last three years and realized that if you took a good hard look (squint here cause it’s going to get ugly) you may be under the impression that I CANNOT put my drink down. Someone, and I have know idea who, once said that you should NEVER be photographed with a drink in hand. Well, I seem to have missed that chapter in Emily Post….. And please by all means if you know who said this, LEAVE AN EFFING comment!!

Back to breaking the golden rule….I have absolutely no second thoughts about my bringing my good ol’ pals white wine and whiskey into the picture. I have decided to poke a little fun at myself for your reading pleasure and give you a montage of my inhibitions as a “drink holding picture taker AT LARGE”. And believe me there are no rules when it comes to keeping that drink in my hand, NO MATTER WHAT! So please, if you ever happen to be at a party with me and someone breaks out the camera, will you hold my drink?


To check out AWESOME video of what happens when I put my wine glass down, it will brighten your day for sure, check it out here.

The video was inspired by Michelle, she introduced me to Paula when I was like 10 and helped me with all the choreography. This is a limited release for your viewing pleasure.  {I can NOT be responsible for this, nor can I believe she is sharing it with the whole internet!}

F is For Facebook + Fertility + Free Printable

15 July 2010 | 4 Comments
Happy Thursday y'all. 

I have lots to tell you, but first...

Want to join?  I promise not to annoy the hell out of you with Farmville {who DOES that?} and/or share my addiction of Family Feud.  It'll only be quality annoyances like updates on the blog and/or fun things I come across and want to share with you.  Click here.  Come sit at my lunch table.  It's just me over there and I'm lonely.  All the cool kids are doing it.

Next up, a sneak peek at Finn's big boy room...


I am *thisclose* to finishing it up.  The wall color stayed the same because we love it, which also means easy.  The last item, a fantastic $35 Craigslist find that needed a lot of attention.  I'll have it for you in detail next week.  I can't wait!  It is such a cool space now even though I cried packing up all of Finn's baby things.

See the cute little number picture?  I made it {and I use that term lightly} in 2.4 seconds and you can download it from my Scribd account in the classic colors seen above or a little bit of a girlie version as well.

Also next week?  My family arrives for it's yearly pilgrimage to the Ann Arbor Art Fair.  I have a big family dinner planned for Wednesday, I'll share the menu + recipes with you, of course.

My appointment with the Reproductive Endo was awesome.  He recommended a different drug and had high hopes that numero dos will indeed at some point make his or her appearance and that all is not lost in the hope department.  If you click to the wiki article, skip right on past the breast cancer stuff to the off label uses, bonus is that the side effects are supposed to be a lot easier to handle.  Fingers crossed peeps.  Fingers crossed.

Oh, and the bathroom?  You know the one we started in March?  Yep, that one.  It's finally getting wrapped up as well.  Why is it that my husband can tear out walls, have them back up, things tiled, and installed all in a week, yet the trim pieces take three months?  I do not know the answer to that, but if you do, let me in on the secret.  I'm practicing patience.

What else do I need to do in the next few days?  Finish up my book club reading, get to the gym, and clean this wreck of a house.

I hope your Thursday is fabulous.

Three Year Olds & Listening. Help!

14 July 2010 | 5 Comments
Finn is three.  He is cute, imaginative, and too smart for his own good.  He is funny {in his own mind}, he's helpful, and he is a really fun child to raise.  He has been easy, we are spoiled and fully expect that the next one is going to be just awful. 

He also has recently developed a little habit that makes Dave & I want to tear our hair out.

He pretends we're not talking to him. 

He doesn't do something we ask immediately, it usually takes us asking twice or even multiple times.  He will even blatently ignore us when we look him right in the face and tell him to do something.  It's like he just decides to give us the big Eff You and simply does what he wants.  It is getting to the point of being a problem.

Now, I don't want to be one of those parents that screams, I don't want to spank him daily, or put him in time out all day long, or worse, ignore it and have a spoiled little brat.  I do want to be his parent and help him through this craziness and I do want the listening to begin again.  He has good days and bad days, the good days give us hope that it's over, the bad days make us both frustrated.  In fact, I wrote this post about two weeks ago and he was doing fantastic again until yesterday when it all fell apart again.  I know he is three and he's testing the waters, I just don't know what to do about it. 

We've tried to pin down days when it seems worse than others and there really isn't any rhyme or reason.  We've tried to pinpoint the amounts of exercise he's had for the day, if he's had any sugar,  if he's hungry, too much or too little napping... it happens on days that we watch tv and days that we don't.  The only thing we have noticed is that it is usually a full day of it.  It's almost as if he gets up in the morning and just says, "eh, today I'm going to ignore them."

We really really try to praise him when he's doing things right, we aim for consistency... though we don't always hit the mark and we have zero problems removing him from the situation {leaving friends houses or the store or wherever we might be} if he's misbehaving.  I'm the mom that says "calm down or we're leaving," and will pick him up and take him out if it doesn't stop.

We are not perfect parents by any means, but this... this is making both of us feel like crappy parents.  We want to spend our time with him laughing and having fun and doing things, not yelling or arguing or being upset.     

Just keeping it real peeps.  I need your tips, your techniques, your advice.  What did or didn't work for you?  Is it just something we have to chalk up to childhood and deal with?  Is this what every child goes through?  Should I just be greatful that {generally} in public he's a little angel and NO one believes he's insane some days?

Grilled Peaches + Pineapple

13 July 2010 | 7 Comments


Grilled Peaches + Pineapple

Cut peaches in half and pineapple in slices.
Dip in vanilla sugar or vanilla simple syrup.*
Put on a hot grill and turn once.
Cut into bite sized pieces + serve with vanilla ice cream.

Lovely way to enjoy summer fruits.


* To make vanilla sugar, simply store vanilla beans in sugar.  For simple syrup, put 1 cup sugar + 1 cup water in a sauce pan and heat until the sugar completely disolves into the water, cut open and scrape one vanilla bean adding to the simple syrup, allow to cool completely.

Linked to: Tickled Pink, Show & Share Day
Related Posts with Thumbnails
*